Description
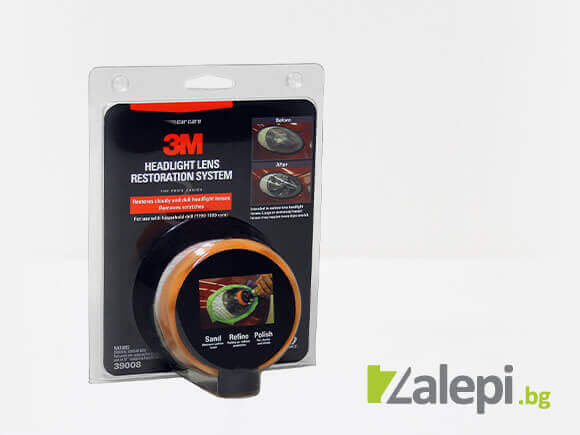
3M Headlight Restoration System - a perfect look of your headlights guarantees needed calmness on the road
All modern cars have polycarbonate (plastic) headlights which many people know as crystal headlights because of high transparency of the material. Plastic headlights are resistant of light strokes and other external impacts but after a period of time they lose their transparency and get yellowed and clouded.
Sunlight and road damages as rocks, sand, tree branches harm the headlights and decrease their good look. It prevents proper lighting when you drive on the road at night. When your car has scratched and clouded headlights, it can be a precondition for accidents. Especially for xenon lights where the illumination is extremely minimized.
3M Headlight Lens Restoration System kit is designed for every craftsman for easy home headlight restoration. It consists of all needed instruments for polishing as sandpapers, polish paste, drill attachment, even masking tape for preventing the paint. You can use a standard drill or cordless screwdriver to polish with. You don not need some special skills to operate with the 3M scratch remover kit. For about an hour everyone can polish his car’s headlights.
How to use 3M Headlight Restoration Kit?
Step 1 – Primary treatment of headlights:
- Clean the lens with water and soap (other cleaner).
- Protect the surface around the headlights using the green color 3M masking tape.
- Mount the back-up pad into the drill or cordless screwdriver.
- Attach and center the P500 grit gold color abrasive disc to the back-up pad.
- Using medium to light pressure begin sanding to remove the yellowing and surface defects from the lens. When the
disc is clogged or no longer sanding effectively, replace with a new P500 grit disc. - Clean the surfaces after the process. If yellowing, defects, or portions of the surface coating still exist, continue sanding with P500 grit discs until they are completely removed.
*The lens should have a white, evenly sanded surface that appears to look “frosted.” If any portion of the lens looks clear or glossy, continue sanding before moving to the next step./em>.
Step 2 – Reducing scratches:
- Remove the gold-colored P500 disc. Attach and center a P800 grit abrasive disc to the back-up pad (white sanding discs with purple printing on the back).
- Using medium to light pressure, begin sanding. Make several passes to the entire lens to reduce the P500 disc scratches. When the P800 disc is no longer sanding effectively, replace it with a new one.
- Wipe the lens, notice the scratches are finer. If any coarse scratches are visible, continue sanding that area with the P800 disc.
- Remove the P800 disc. Attach and center a 3M P3000 Trizact™ Foam Disc. This is the thin, foam disc that looks green/grey in color.
- Using a spray bottle, apply enough water to dampen the 3M P3000 Trizact™ Foam Disc and the lens surface before sanding. Using medium to light pressure, begin sanding to reduce the P800 disc scratches. If the lens’ surface is dry use water to dampen it.
- On many lenses, a white residual or slurry will build up on. It indicates you are reducing the sand scratches. Continue with 4-6 passes over the lens after you start seeing the white residual or slurry on the lens surface. If the lens does not produce a white slurry, make 10-12 passes on the lens.
- Wipe the lens and if you notice there are coarse scratches visible, dampen the lens and continue sanding with the P300 disc.
*When working with the P800 abrasive disc it is perfectly normal to dispense a rather large amount of white powder. This means that the removal of damaged areas from the lens of the lighthouse is successful..
Step 3 – Polishing:
- Remove the P3000 foam disc. Attach and center the orange foam compounding pad.
- Dispense a dime-sized amount of 3M™ Headlight Lens Polish to the orange foam compounding pad. Before turning the drill on, smear the polish with the orange foam pad around the lens. Do not run the foam pad dry.
- Holding the pad flat on the lens, polish the lens until the cloudy haze is gone and the clarity is significantly improved. If sanding scratches are still visible on lens, repeat again 4-7 from Reducing scratches (Step 2) and 1-2 from this Step 3 .
- Remove the masking tape and wipe the lens using clean microfiber cloth. Wash any residual spatter from the
vehicle using car wash soap and a soft, clean cloth.
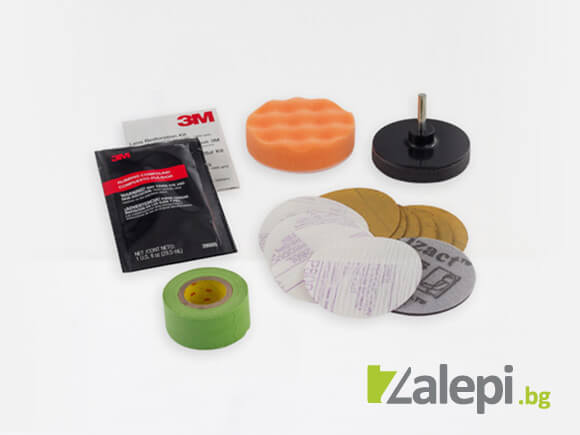
What does 3M Headlight Lens Restoration System consist?
- Disc Pad Holder – 1 piece
- Foam Buffing Pad – 1 piece
- Sanding discs P500 – 6 pieces
- Finishing discs P800 – 4 pieces
- Tizact disc P3000 – 1 piece
- 3M Headlight lens polish (29,5 ml)
- Masking tape – 1 roll (to protect the surrounding car paint)


Reviews
There are no reviews yet.